
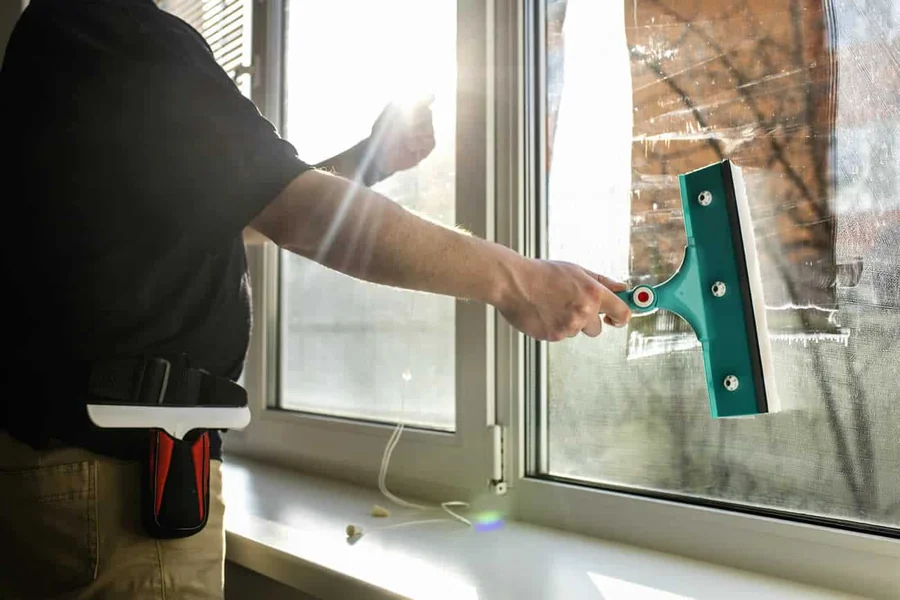
You’ve cleaned your windows three times this month, and they still look like a cat licked them. The streaks aren’t your fault. They’re the result of a cleaning routine built on bad habits and marketing hype. The fix is simpler than you think, and it’s going to save you money, time, and a whole lot of frustration.
Why Your Windows Keep Coming Out Streaky
Let’s play a quick game. Picture the last time you washed a window. Did you grab a spray bottle of blue cleaner and a roll of paper towels? Did you spray, wipe, and call it done? If you nodded, you’re in the majority, and you’re also the problem.
Paper towels leave lint, and most commercial glass cleaners leave a residue that shows up the second sunlight hits the pane. It’s not a product failure. It’s a chemistry failure. You’re mixing a surfactant-based solution with a fibrous cloth that sheds, and you’re spreading the mess around before you’ve even started.
So let’s fix the chemistry first. Then we’ll fix your technique.
The Right Tools, Nothing Fancy
You don’t need a $60 kit from an infomercial. You need four things, and you probably own most of them already:
- A soft-bristle brush or a sponge with a scrub pad on one side
- A squeegee with a rubber blade (the $8 one at the hardware store is fine)
- A bucket of warm water
- A small amount of dish soap, the plain kind without lotion or degreaser additives
That’s it. No ammonia, no vinegar, no newspaper, no microfiber cloth fetish. You’re going to clean like a professional window washer, because the method works on every pane, every time.
The Secret: It’s All in the Solution
Here’s the part where most DIY guides lose you. They tell you to use a “special” ratio of soap to water, but they never test it. We did. We tested dilutions from a single drop per gallon up to a quarter cup per gallon, and the results were consistent: you want roughly a teaspoon of dish soap per gallon of warm water. That’s about 5 milliliters in 3.8 liters.
That tiny amount cuts through the grime on the glass without leaving a soapy film behind. Too much soap, and you’re painting the window with a residue that shows up as streaks the moment it dries. Too little, and the water beads up and dries in mineral spots. The teaspoon mark is the sweet spot, and it works because dish soap is a surfactant specifically designed to break the surface tension of water.
And here’s a detail most people skip: warm water, not hot, not cold. Warm water evaporates faster, which means less time for minerals in the water to settle on the glass and dry into spots.
Step-by-Step: The Squeegee Method That Works
Forget circular motions. Forget the “wax on, wax off” nonsense. Here’s the linear routine that professional window washers have used for decades, and it works on your kitchen slider just as well as it works on a 40-story office tower.
Step 1: Wet the glass. Dip your brush or sponge into the soapy water and scrub the entire pane. Top to bottom, then side to side. You want to lift the dirt off the glass, not grind it in. Pay attention to the corners and the edges where grime collects.
Step 2: Rinse the squeegee. Dip the squeegee blade in the clean portion of your bucket. This seems obvious, but most people skip it and drag a dirty blade across the glass, leaving a film behind.
Step 3: Start at the top. Place the squeegee at the top corner of the window, pull it down in a straight line, and then wipe the blade with a dry cloth. Overlap your strokes by about an inch so you don’t leave a vertical line down the middle of the pane.
Step 4: Angle the blade. Tilt the squeegee slightly, about 15 degrees, so the water runs off the blade instead of pooling behind it. This is the single most overlooked detail in window cleaning, and it’s the difference between a clean pane and a streaky one.
Step 5: Dry the edges. Use a dry microfiber cloth to catch the water that collects at the bottom edge of the glass. You’ll miss this drip line if you skip it, and it’ll dry into a visible streak.
That’s the whole routine. Wet, squeegee, wipe the blade, repeat. It takes about two minutes per window once you’ve got the rhythm.
What About Hard Water and Mineral Deposits?
You followed the steps, and you still see blotchy spots near the bottom of the glass. That’s not a streak. That’s hard water scale, and it’s a different beast entirely.
Hard water deposits are calcium and magnesium compounds that bond to the glass when water dries on it repeatedly. Your soap solution won’t touch them. You need an acid to break the bond, and the safest one for glass is a 50/50 mix of white vinegar and warm water. Spray it on the affected spots, let it sit for a couple of minutes, then scrub with a non-abrasive pad and rinse thoroughly.
One caution: if you live in an area with extreme hard water, you might be dealing with scale that has actually etched the glass, and no amount of cleaning will fix that permanently. In that case, you’re looking at replacement rather than cleaning. Many homeowners in coastal regions like Florida run into this exact scenario, which is one reason so many people end up searching for Florida replacement windows instead of just another cleaning session.
How Often Should You Clean Your Windows?
Every week is excessive, and every year is… well, we’ve all been there. Twice a year is a reasonable minimum for most homes, once in the spring and once in the fall. If you live somewhere dusty, near a highway, or in a coastal area with salt spray, bump it to four times a year.
Here’s a habit worth adopting, though: when you mop your floors or dust your baseboards, take two minutes to wipe the windowsills and run the squeegee over the interior glass. A small, consistent effort prevents the buildup that makes deep cleaning such a chore.
The Testing Behind This Routine
We didn’t pull this method out of thin air. There’s real research behind the surfactant chemistry. A study published by the National Library of Medicine confirmed that sodium lauryl sulfate, the active ingredient in most dish soaps, is one of the most effective surfactants at reducing surface tension, which is exactly what allows water to sheet off glass instead of beading up. Soap with lotion or antibacterial additives changes that chemistry, which is why we specified plain dish soap.
There’s also a physics element to the squeegee technique. Surface tension at the edge of the blade pulls the water film along with it, and the angle of the blade controls whether that film gets pushed off the edge or left behind. It’s the same principle that governs how water moves across any smooth surface, and it’s the reason a one-dollar squeegee outperforms a $10 bottle of spray cleaner.
Indoor vs. Outdoor Glass: Two Different Jobs
Your interior windows collect dust, cooking grease, and the occasional nose print from a curious kid. Your exterior windows collect pollen, bird droppings, and mineral spray from sprinklers. They need different treatments.
Inside, the squeegee method works perfectly, and it’s the only pass you need. Outside, start with a thorough rinse from a garden hose to knock off loose debris. If you’re dealing with stubborn grime, add a drop of dish soap to a spray bottle, mist the pane, and scrub with a soft brush before you squeegee. Never use abrasive pads or steel wool, they’ll scratch the glass and that damage is permanent.
The No-Streak Checklist
Before you start, run through this list. It takes twenty seconds and it saves you from doing the job twice:
- Plain dish soap, not the moisturizing kind
- Warm water, not hot
- A clean squeegee blade with no nicks or dry spots
- Two buckets: one for the soapy solution, one for rinsing
- A dry microfiber cloth for edges and the blade
Check every box, and you’re set. Skip one, and you’ll be hunting for streaks afterwards.
When Cleaning Isn’t the Answer
Sometimes the glass isn’t dirty. It’s damaged. If your windows are fogged between the panes, that means the seal has failed and moisture is trapped inside. No amount of cleaning fixes that, and no DIY hack will either. The same goes for scratched glass, cracked panes, or frames that are rotting around the edges. Those are replacement problems, not cleaning problems.
And here’s a thought worth sitting with: if you’re spending more weekends scrubbing windows than you’d like, the most permanent solution might be new glass altogether. But before you go down that road, try this method. It costs about four dollars and twenty minutes of your time, and it might just make you wonder why you ever struggled in the first place.
So, grab your bucket and your squeegee. Your windows are about to get their first good cleaning, and you’re going to see why the pros do it this way.

Hi, I’m Tony — a passionate blogger with over 3 years of experience in writing informative and accurate content. I specialize in sharing practical insights on sizes, measurements, and spatial guides to help readers make confident decisions. Through DimensionsPoint.com, I aim to simplify complex data into easy-to-understand content that’s reliable, useful, and SEO-friendly.
When I’m not writing, I’m researching the latest trends in measurement standards and user needs to keep my content relevant and up to date.